Monday, November 25, 2013

Dyeing and the Silk Industry During the Late 1800s

This article is an introduction to the next one which will be about Leek Embroidery

Thomas Wardle (1831-1909) of Leek in Staffordshire was an English dye chemist and printer who devoted much of his life to development of the textile printing industry employing both locally woven and imported fabrics. He had widespread interests, considerable energy and solved many problems associated with the dyeing of fabrics making many technological breakthroughs and innovations in the process.

Colour played a defining role in his life. He developed consistency between dye lots, colour fastness and also the variations of shades in colour ranges. His company printed small runs of fabrics using both natural and chemical dyes. He used wood printing blocks and, with over printing, created extra colours.

William Morris was a protégé, business partner and friend. Together they experimented with dyeing and printing using natural dyestuffs. Morris would create a design which was cut into woodblocks and which were used for short run printing. Morris and several other lesser known artists designed for the Arts and Crafts movement which was hugely influential in developing public taste as it moved forward from the tastes of the Victorian era. Prior to this time, the fashion had been for Berlin work where the colours are vibrant but there are few shades within a colour range. A look at the William Morris designs gives you an idea of their complexity, richness, balance and subtlety of colour.

A label reads:

Design Indian Poppy, c 1884-89, based on a woven French silk, Tussur silk cloth hand-woven in India. Block-printed by Wardle & Co, the Hencroft Works, Leek, stitched with Indian tussur silk yarn dyed with natural dyes by T & A Wardle, the Churnet Works. Leek Embroidery Society. (SMDC Collection)

The Wardle Company also dyed textiles for bulk orders such as for the Admiralty. And they dyed hanks of wool for the carpet industry as well as threads for sewing, embroidery and braids. He was the major supplier of printed textiles to Liberty's on Regent Street as well as to Harrods in Kensington. And he had a store under his own name on Bond Street.

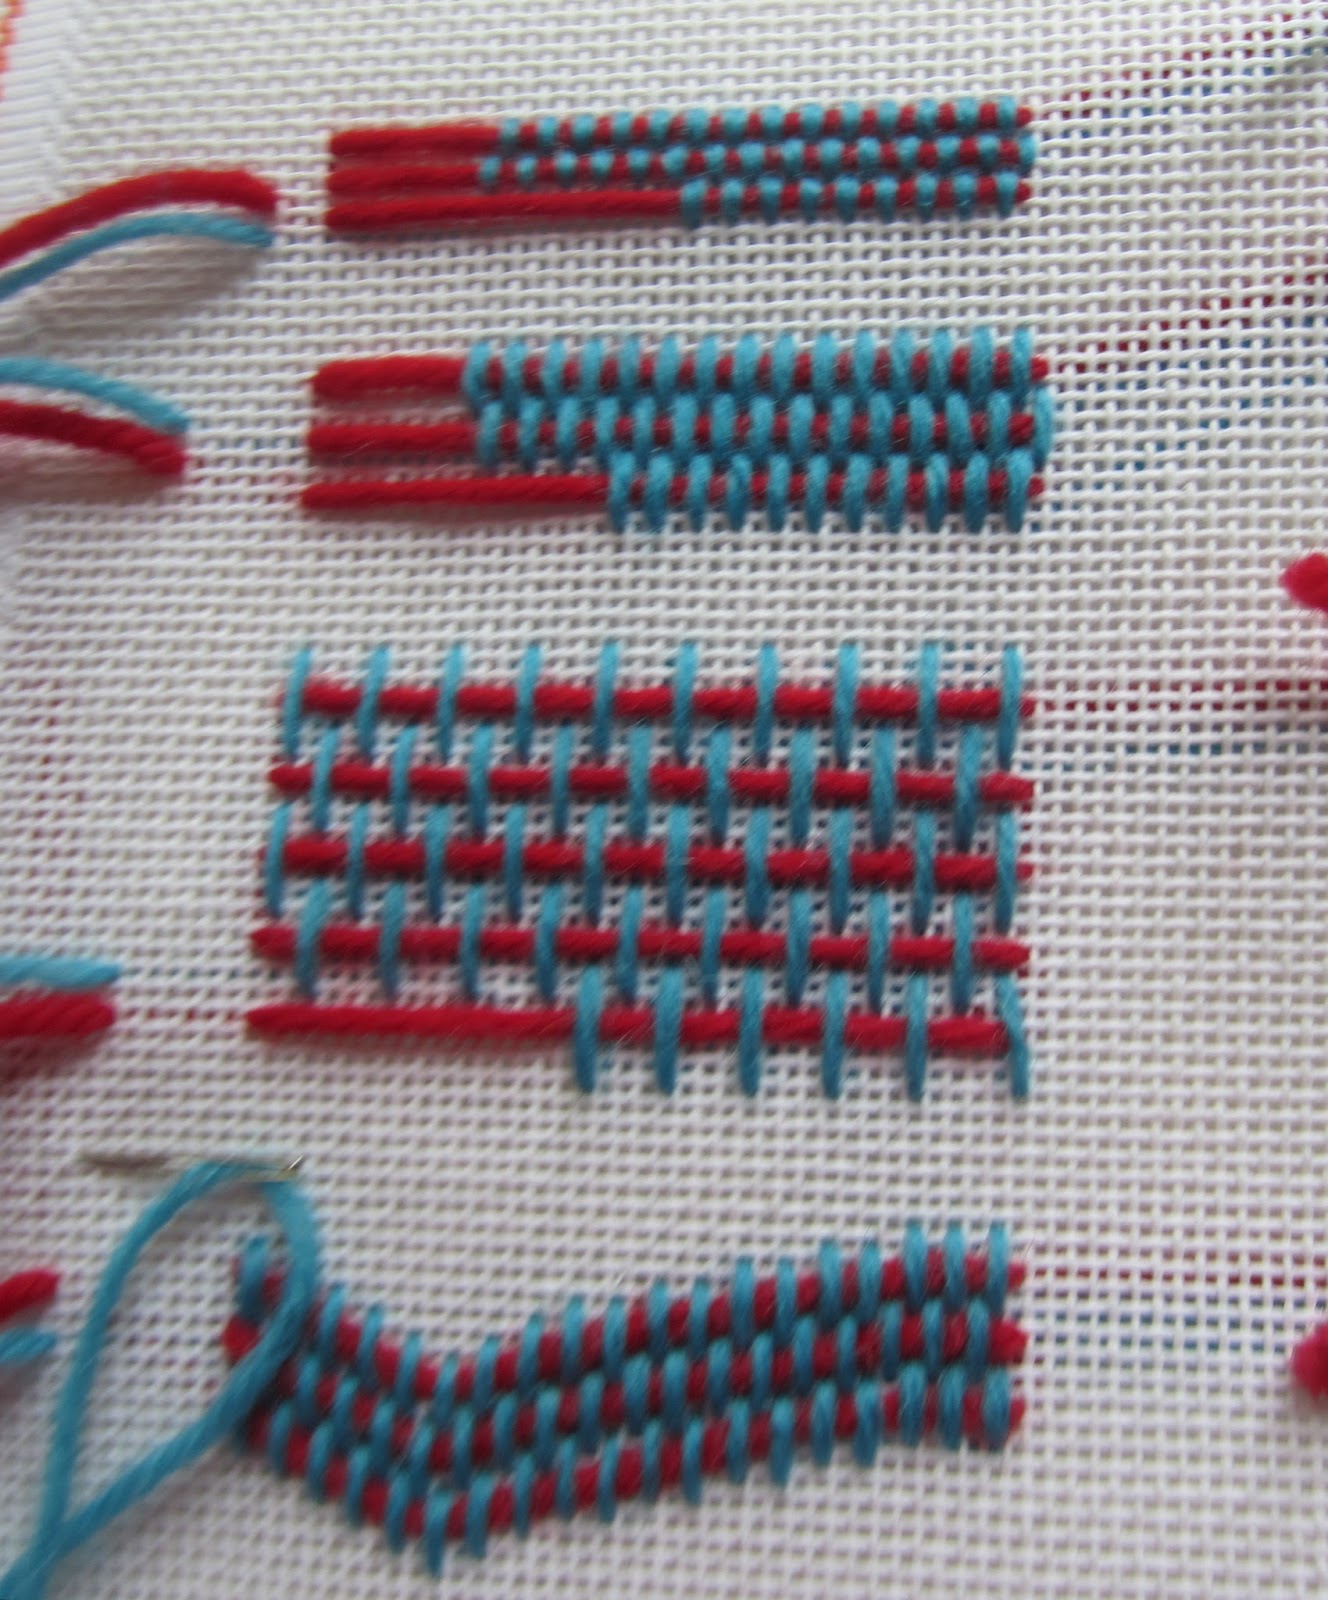
Tussur Silk became a huge part of the life of Thomas Wardle. Tussor Silk is the product of a large, wild silk moth native to India. The fibres are long and this length creates the sheen in the fabric and in the embroidery threads. Although it is a durable fibre, it is beige in colour and resistant to being dyed.

He spent many years experimenting with ways of processing the fabric and dyeing it to produce a jewel toned range of colours. This silk fabric became enormously popular and fashionable in England as well as France. The discarded (short) fibres were used to create Sealcloth, another invention. This fabric was water resistant and in high demand to make coats and cloaks.

Late in his life, he travelled to Kashmir (India) where there was a famine and the silk industry was failing. His knowledge and experience brought changes, revitalizing the industry and providing employment for thousands of Indians and lifting them out of poverty for decades to come.

The long silk fibres were made into embroidery threads with a range of shades within a colour. In 1879, Thomas took some of the threads home and gave them to his wife Elizabeth, an embroiderer, challenging her to find a good use for them.

The accompanying photos are examples of Leek Embroidery. The design woven into the fabric was typical for its time. The embroiderer then used the Wardle dyed silk threads to enhance the woven design. Note the lustre of the silk thread and the good condition of the next piece. It is thanks to Joan Landon who had collected and stored it at her home, Sunnycroft (Blog dated September 15, 2013)

References: ISSUU - Who was Thomas Wardle.
Thomas Wardle and Tussur Silk


Thursday, November 7, 2013

Another Beryl Dean Embroidery

Earlier this week, while looking for something else, I found a photo of another of Beryl Dean's panels. They were commissioned by The Friends of St George's Chapel. This Chapel is within the grounds of Windsor Castle.

This one, The Annunciation, is the first in a series of five. The finished size is 9' x 4' 6". It would have required a special working framing as she described in her book.

I managed this time to get the colours a little nearer to their true colours. The halo area as well as the six flowers or flames are all stitched in a Whitework technique. In this, some of the threads from both the warp and the weft are removed. The remaining threads are used as the foundation for weaving in designs. I have never seen this used with colour and gold threads anywhere else. I think that other examples must exist somewhere and I know that you will tell me where they are.

The book is Church Embroidery by Beryl Dean 1982. ISBN 0-264-66842-1

Monday, November 4, 2013

Windsor Castle and St. George's Chapel

I have been on vacation in England and Europe visiting lifelong friends and family. Yes, I had a wonderful time because it is such a treat to see everyone and to spend time in London and the Channel Islands.

My cousin, who had written ahead and made the arrangements, and I visited Windsor specifically to see the Beryl Dean Embroideries. We were expected and were taken through the rope barriers to the case where the embroideries are now stored. The case was then unlocked by a staff member so that we could see all five of the banners. Everyone was most helpful and it made a huge difference that they were expecting us.

I had forgotten how large the panels are, probably around 10 feet high by 5 feet wide. The size makes them difficult to photograph but the guide book features this one: The Adoration of the Magi. A scan and a screen shot of the page in the book is the best reproduction that I am able to provide for you. This photo does not do the panel justice at all.

The background fabric was specially woven and is cream coloured with a silver thread included in the weft. When one has the opportunity to look closely the detail is fascinating and the workmanship incredible. But I would expect no less from such a talented designer and broideress. The closer one looked, the more one saw. All the faces were different in structure and expression and each one had eyes that saw you and returned your gaze. All the different techniques used were astounding.
Interestingly, though there is a lot of detail in the background, it remains in the background leaving the figures to be prominent and draw your attention. I have added an enlargement to give you a little more idea of the intricacy in every square inch of these embroideries. I wish that I could have provided better photos for you but this is the best that I can manage.

Needless to say, if you should happen to be in Windsor, go to St Georges's Chapel within the grounds of Windsor Castle. Write beforehand and tell them your schedule and ask to see the Beryl Dean Embroideries. At the moment, the lighting available near their locked case is poor but I have asked the Chapel to consider installing lighting that can be switched on only when visitors such as us make a request to see the panels. The case and the lack of any direct light will preserve these remarkable pieces for posterity and I hope that they will be enjoyed by many future generations.

Write to:

The Archivist
Archives and Chapter Library,
The Vicar's Hall Undercroft
The Cloisters
Windsor Castle,
Windsor, England
SL4 1NJ

They prefer to receive such requests by mail.

Beryl Dean was such a remarkable and talented lady that I am surprised that no one has yet written her biography. This would be an excellent subject for a University Thesis.


Tuesday, September 24, 2013

Royal School of Needlework - Part 5: Extended

The earlier RSN post triggered many responses and more information which I am delighted to share with you.

Marion Scoular, who many of you know, and who was a student at RSN just after I left, tells me that the gown worn by the Queen for her Coronation, was not only designed by Norman Hartnell but was constructed and beaded in his workrooms. RSN did not do beadwork.

The train or robe was designed and stitched at RSN by their work room staff. It took 12 embroiderers 3500 hours of stitching to complete this, working round the clock from March to May. The cuttings from the velvet of the train were made into pin cushions and sold to the public. Does anyone happen to own one of these pincushions?

A further email from Debbie credits the National Trust for preserving Joan Lander's embroidery and legacy.

Sue Jones of Shropshire tells me that she was fortunate to meet Joan Lander once or twice as an elderly lady. Joan was President of the local Embroiderer's Guild. At one meeting where the speaker was dismissive of traditional embroidery skills, Joan got up and walked out. I do remember hearing about this at the time but did not then know who Joan Lander was. There was a time a few decades ago when embroidery was very experimental and people were not interested in traditional work. That time has passed and experimentation has become more moderate and the traditional skills are honoured. Sue comments that Joan's embroidery was exquisite.

I hope that the correct information plus this wonderful photo will set the record straight.

A future subject for this blog will be Leek Embroidery. If you have some information on this subject, I would appreciate receiving it so that the record here is as complete and accurate as is possible.


Sunday, September 15, 2013

Royal School of Needlework - Part 5: We Hit the Jackpot!

Every now and again, the internet delivers a wonderful surprise. In early September, Debbie, who lives in Shropshire, England sent me a brief note saying she was able to identify the young lady who was stitching the GoldWork Sampler in the class photo at The Royal School of Needlework. Would I like to know her name?

I felt that I had won the pot of gold at the end of a treasure hunt. My profound thanks to Debbie for the initial information and then looking for more and sending me all that she found.

The young lady stitching that complex piece was Joan Lander. She was older than us teenagers having served as a nurse during World War lI and then started training at the Royal School of Needlework in 1947. At the time of the photograph she would have been in her last year of studies (see Blog entry of July 4, 2013).

Joan Lander's family home was Sunnycroft. Wikipedia supplied the following history:

Located in the market town of Wellington, Shropshire, England, and owned by the National Trust as one of their more unusual properties.

Suburban villas were almost 'country estates in miniature' that attempted to emulate upper class mansions on a middle class budget. Many have either been modernized, renovated or refurbished out of recognition over the last 60 years or so or have been demolished and replaced with later housing, converted into offices or residential care homes, or have been broken up into flats and smaller residences.

Rare Survivor

Sunnycroft remains intact, complete with the original interior fixtures and fittings, many of which are still in place and therefore has a unique character and intimacy that is often lacking from larger properties but very evocative of its time and place.

Sunnycroft was built in 1880, and extended in 1899. Uniquely the house remained in the same family from its completion in 1899, until it was bequeathed to the National Trust in 1997.

The National Trust summarises Sunnycroft as:

A late 19th-century gentleman's villa – typical creation of Victorian era suburbia
Rare unaltered interior, with an elaborate conservatory
A mini country-estate, with pigsties, stables, kitchen garden and orchards
Colourful borders and summertime flower displays
Superb long avenue of redwood trees and lime trees.

Visitors to the house will get an insight into some of the exquisite embroidery worn at Westminster Abbey and can browse through souvenir newspapers.

The ‘Thread Through History’ exhibition is housed in Miss Lander's former bedroom and embroidery workshops are planned throughout the year.

Joan Lander travelled far and wide to teach embroidery and traded as Joan Lander Designs. She was awarded a gold medal by the Royal School of Needlework and held lessons around the dining room table at Sunnycroft.

Joan’s travels led her to collect all sorts of textiles and designs that inspired her work – including several pieces of Leek embroidery – providing a link with the likes of William Morris, who designed pieces for the Leek Embroidery School.

“Among the amazing collection we have also recently discovered what we think is the largest collection of Leek embroidery in the country.”

The fabulous colours of the silks and fabrics have been perfectly preserved through years of being hidden away in various pieces of furniture throughout the house.

National Trust curators and conservators have been delving in to cupboards and chests of drawers to create this fascinating new exhibition.

Joan worked on the embroidery of the Queen’s Purple Robe of Velvet at the 1953 coronation.


Leek Embroidery is William Morris Designs stitched with Silk Thread. I had never heard of it until now.

The following piece of embroidery is now owned by the National Trust. Designed and stitched by Joan while a student at RSN, it is probably her sampler of Laid Work. The appearance and the fact that it was stitched with silk threads leads me to that conclusion.

Joan Lander, bequeathed the house and estate to the National Trust. Realizing its historical value, she did not alter or modernize the house.

You will find a tour of some of the house, contents and the gardens on the following site:

http://www.flickr.com/groups/sunnycroftnt


There is a picture of the billiard table which she did not use for billiards but rather as a storage area for her embroidery supplies. There is only one photo of her embroidery on this site but her early RSN samplers would have been the same as mine.

I have also read that she also worked on the gown the Queen wore to her Coronation. She was chosen to be part of this team because of her exceptional skills particularly in GoldWork. From the wording, it is not clear if it was the gown or the velvet train she worked on but both were embroidered by the Royal School of Needlework.

Debbie thinks that Joan’s GoldWork sampler may be in a local church and hopes to be able to find it.

To add to this discovery, Debbie found a Pathe News Film dated 1951. It was taken at the Queen's presentation of Diplomas to graduating students at the Royal School of Needlework. There is no sound track so here is a quick guide. I think that it was taken in the front office of the school's property at Princes Gate. Everyone bows or curtseys to the Queen and then to the Princess Royal who is seated on the Queen's right. The gentleman with the Queen is Earl Spencer, father of Princess Diana.

http://www.britishpathe.com/video/queen-elizabeth-at-needlework-exhibition/query/royal+school+of+needlework

The graduating students are, first, Joan Lander. She had won the Gold Medal as an excellent student. There is a bit of repetition and you will see her twice. The second lady, I do not know. The student second to last out of four (at 00:21) is myself!! Continue watching through the gentlemen receiving their honours. They were also graduates of RSN, presumably from the night school program as they were not among the day students. Following this, you will see the Queen touring the display of students' work. She is accompanied by Joan and is looking at the sampler which I am sure that you will now recognize. I am standing in the doorway at the back. I was wearing a blue wool dress made by my mother from a Vogue pattern. Is not the Queen a truly beautiful woman with a wonderful smile!

A link to another very short video of this momentous occasion was supplied by Claire Reeves of the National Trust. In this one, you will see more of the stitched samplers.

http://www.itnsource.com/en/shotlist/BHC_RTV/1951/12/24/BGU412150048/?s=Joan Lander

Notwithstanding Pathe's assertion that the film dates from 1951, I think that it is more likely to be 1952. My recollection is that RSN did not have a presentation in '51 because there were so few students actually graduating that year so the presentation of their certificates was postponed until '52. But until I locate my Diploma, I cannot be sure of the date.

I do remember the day and receiving my Diploma from the Queen. I did not get a higher level Certificate as I had only been a student for 18 months and had not completed the three year course. But I worked as hard and as fast as I could and completed about 2 1/2 years worth of work.

Debbie happened to find my blog as she is interested in embroidery and has taken a course on Crewel Embroidery taught by RSN and presented in her neighbourhood. She is eager for there to be another course and hopes to have the time to attend. She sent me a photo of her project which is a real credit to her and I hope that she will be able to continue this interest.

I hope that you have enjoyed this blog entry as much as I have creating it.


Monday, September 9, 2013

Burden Stitch - Part Two: a Tutorial

If you are using Burden Stitch as part of a design, you will have already decided on how you plan to complete the surrounding areas. On this sample, which is going nowhere except onto this blog, I had to decide on completion. The decision was a solid blue background around the area on the right and a section without blue fabric on the left.


The next step was to sink, or plunge, the ends of gold thread in the left area. Make yourself a lasso using a length of Perle thread or DMC, fold it in half and thread the two thicknesses into the eye of a Chenille or Tapestry needle. Make a hole with your awl in the spot you wish to take the gold thread through to the reverse side of your fabric. The lasso goes into that hole. Place the far end of the gold thread into the loop of the lasso. Gently ease the lasso and the gold thread through to the reverse side of your work. If you catch the gold thread too close to the stitching, it will not go through the fabric smoothly, The gold wrap will get stripped off its core and you will be unhappy with it and probably have to restitch that row.

Lassoing /plunging can be useful in other situations. It can be used for starting a thread or finishing cord that is too thick to go though any needle. If you have reached the end of some stitching and the last bit of thread is too short to finish off normally, then lasso it to the reverse side of your embroidery. It can also be useful in weaving threads into the reverse side of your work.

For the covered area on the right, I also lassoed the gold thread but placed the holes away from the edge of the circle where they will be covered by the blue fabric. Then, using a length of dressmaking thread, I whip stitched the ends of these threads to the the backing fabric. I do not always do this but felt that securing them was necessary in order to maintain the correct alignment of the gold thread on the front of the work.

Next step was to couch a single line of gold thread to the left side of the circle. I tried using one thread of gold with six threads of DMC along side but the DMC has a lower profile and slid under the gold. Unsuccessful and abandoned.

The blue fabric is a sample of drapery fabric from my stash backed with one layer of felt. I trimmed the inner edge of the fabric to about 1/4" and nicked it so that it would lie flat. Then I pinned it and basted it into position.

Using one thread of blue, I catch stitched around the inner edge of the blue fabric.

To complete the sample and to secure the blue fabric and felt to the background, I couched two threads of gold as a pair a specified distance from the inner edge. Once again, I used the reverse side of the very helpful business card to help me maintain an even distance from the edge.

And that is that. Completed. I hope that this tutorial has been helpful by taking the mystery out of working with this stitch and by making it simpler and less prone to hazard and unwelcome surprises.

The Flying Horse is stitched in Burden Stitch which is used as a solid filling stitch. It is part of my Metal Thread Sampler from RSN. The photo is not as good as I would have wished because it was taken through glass. The framed sampler is too large and heavy to move easily so we used the available light in our hallway.

Wishing everyone Happy Stitching.


Monday, September 2, 2013

Burden Stitch - Part One: a Tutorial

Burden Stitch is exactly that, a burden to stitch but I think that Burden is meant to be a noun and not an adjective. Barbara Lee Johnson's recent post on August 13, 2013 of the Couched Oak Leaf is a good example of Burden Stitch stitched on canvas. It is a stitch that can be used either very simply or you can set yourself a challenge. It really is a technique and not a stitch.

In a nutshell, this is a canvas work stitch called Trammed Upright Gobelin Bricking (Canvas Work by Jennifer Gray, pages 53 - 55). Worked on canvas or on even weave linen is the simplest way to use this stitch. It produces a solid ground cover or an interesting texture. Barbara Lee's example is an excellent sample of this.

When used on other fabrics, both planing and experimenting in stitch size and spacing is essential.

Number One Hint is to get organized. Back your fabric with a suitable weight of cotton fabric. This helps keep the tensions of your piece of work stable while you stitch and afterwards. It is also handy to for ending threads. I used Japanese Gold thread Number 12 with DMC Floss four threads which I stranded. Reading Mary Corbet's Blog, I see that it is called Striping. I have never heard this referred to by name and used Stranding instead. By either or both names, separate the six strands of floss thread into single strands and then put them back together. You can mix shades and create your own colours or, this time, use four threads of pure colour: DMC Blue 825.

Having marked your design on the background fabric, Hint Number Two: Baste in some horizontal and vertical lines to create an accurate grid that will help you keep your stitching accurate. This is specially necessary when working on a fabric where threads are not countable. This piece of fabric proved to be even count linen but even in this fabric, the threads vary in size.

Hint Number Three: Make a decision on the spacing of the couched thread (gold) and the length of the couching stitch. The gold thread is held in place by the spaces between the gold thread and the vertical couching stitches. I made the decision on this demonstration piece to place my vertical stitches four fabric threads apart. The second row of vertical stitches is centred between the previous row; that is, two threads on either side. Leave a tail of gold thread 1" or even 1 1/2" at each end of every row. This is necessary for sinking the ends of the gold thread. Any less length will cause you problems.

Hint Number Four: Use the blank, reverse side of a business card. Mark the spacing on the edges with a sharp pencil which will help give you the most accurate of templates. A ruler is OK but you will find your self constantly having to not read most of the marks on it. The blank card is a simpler solution.

Mark: a) the spacing between the horizontal gold threads and b) the length of the vertical couching threads.

Mark this spacing on two different edges of the card.

Use it on every row to set the spacing and length of the stitches. This is essential.

The straight edge is handy for checking the alignment of your stitches.

Hint Number Five: Using a length of dressmaking thread, anchor the ends of the gold thread out in another part of the design with some small stitches. This does not have to be totally accurate but it serves to anchor the gold thread leaving you free to focus on the stitching. The waves in the gold will disappear during the completion of this stitch. The gold thread that I used was from someone's stash. It had been wound on a small spool which made it exceptionally wavy. Japanese Gold Thread usually comes wound on a largish reel like dressmaking thread or as a hank. In this form, it is fairly straight.

Hint Number Six: Start in the centre of the widest point of the area being stitched. Work to the circumference in one direction and then return and stitch the other half of that row. The first line is by far the hardest to stitch. After that, you just have to follow your planned spacing and keep it all accurate. Use as small a needle as you are able to thread comfortably and insert it into the fabric vertically to establish an accurate stitch as possible. A needle entering the fabric at a slant will not give you the accuracy you need for this stitch.

Notice that on the right side, my stitches were off by one thread and I had to take them out.

Hint Number Seven: It is necessary to concentrate on what you are doing. It is totally easy to make an error in stitch placement and it shows up unbelievably clearly. Keep checking yourself and reverse stitch to where you went off course and correct it. Remember to stitch the necessary half and quarter length stitches.

And lastly, a quick look at an example of Burden Stitch in this piece of embroidery that I stitched a few years ago. The shading is not that satisfactory but I wanted to try it.

Notice the different spacing and threads. That looks to be two strands of DMC Floss.
Burden Stitch would look totally special if stitched with silk thread. It would gleam and not retreat into the background as a texture. It depends on the look you want to achieve as to what threads and spacing you use.

You can use different threads to achieve the result you require. A coloured Perle thread would work well instead of the gold and the couching thread can be anything you choose. You could choose to use beads as the couching thread but be wary. Beads can have a mind of their own and not lie as accurately as you would wish. You may discard a lot of beads in the process. Another possibility is to use Metallic Gilt and cut it into the desired lengths for the vertical stitches. Now that is a way of using this technique that will add grey hairs to your head for sure.

That is all for today. I will complete this demonstration piece in my next Blog Entry.


Saturday, August 17, 2013

Beryl Dean Panels

One idea or a question from the Blog triggers another Blogwrite.

I found, and would like to share with you, a website devoted to the magnificent panels embroidered by Beryl Dean and now in the care of St. George's Chapel which is located within the walls of Windsor Castle. I first saw the panels in the '70s and they were proudly displayed in a side Chapel of the Church. The next time, I was reluctantly allowed to see them after the the caretaker tried to deny their existence. The last time, about 10 years ago, my interest was unwelcome but I got a brief glimpse. The space had become a repository for extra chairs and pieces of furniture. I nearly cried that this had happened to these incredible pieces of ecclesiastical embroidery. On finding the following article on the web, I am relieved to see that they are now properly housed and hung. And treated with the respect they deserve.

The panels are large. A guess would be that they are between 3 and 4 feet wide, and 5 and 6 feet high. The colours are wonderful, and glowing. I think that she used silk threads as well as gold. Photographs do not do these masterpieces justice. I have enlarged the photos in the article but, even so, they only give an indication of their beauty. I do not know if Beryl did all the stitching herself or, if she had help, who else was involved. I wish that I had been one of them. And that says how much I admire them.

If you have a chance to visit Windsor, I heartily recommend that you see the Beryl Dean Panels.


From the College of St. George website:

http://www.stgeorges-windsor.org/about-st-georges/news1/news-archive/2011/beryl-dean-panels.html

2nd August (2011) marks the 100th anniversary of the birth of Beryl Dean. She died in 2001 but her remarkable work lives on at St George’s Chapel and other places in her embroidery and related work.

Between 1969 and 1974 Beryl Dean made five panels to hang in the Rutland chantry, one of the side chapels within St. George’s Chapel. On a background of especially woven linen and lurex she used a variety of techniques such as applique, drawn thread and pulled work. The five panels now hang in a special cabinet in the Ambulatory to protect them from too much light and dust. One panel is always on display and others can be seen on request to the Chapel staff. The work was commissioned by the Friends of St George’s and the Descendants of the Knights of the Garter to mark the Chapel’s quincentenary in 1975.

The five panels depict the Annunciation, the Visitation, the Adoration of the Magi, the Temptation in the Wilderness, and the Miracle at Cana.


Monday, August 12, 2013

Royal School of Needlework - Part Four: Designing

Remembering is fun especially when there is someone else to share memories and add to them. I am indebted to Gillian Cox, now Creelman (the dark haired young lady, second from the right in the first class room photo in my July 4 posting). We were both very happy to learn professional techniques from the masters of the art of embroidery but neither of us was particularly happy to discover that, after learning the basics on established samplers, we were expected to design our subsequent pieces of embroidery. These included Long and Short Stitch, Laid Work, Black Work, Coarse and Fine Whitework and Gold Work. How this piece of vital information could have surprised me is now beyond my comprehension. From hindsight, I will also comment that it is hard to design for a technique about which you, as yet, know little or nothing. I still have a mental block about designing but have developed some coping skills.

To aid us in this endeavour, we spent Friday mornings sketching in the Victoria and Albert Museum, the Natural History Museum and, Gillian tells me, she also sketched in Kensington Gardens and Hyde Park but that was after I had left. She remembers, as do I, that passersby would comment on what we were doing as if we were not there or were stone deaf. I dutifully went to the museums and sketched bits of the Syon Cope and stuffed birds but had no idea why I was doing it.

The Syon Cope is one of England's treasures. For those who do not know about this remarkable, large piece of embroidery, I will explain why. Made between 1300 and 1320, it is an example of the high degree of artistry and the use of the technique of Underside Couching. Commissioned by wealth it was made by professional stitchers in a workshop. The most expensive of materials was used and it was extremely labour intensive. Underside couching was a specialty of England and is known as Opus Anglicanum. The Syon Cope was taken out of England during the reign of Henry V111 for safe keeping and remained in France until the early 1900s when it was returned. This saved it because otherwise if would have been destroyed and the extensive amount of gold used in the gold thread would have been recycled into the Exchequer. I hope that this information is correct but you can read a lot more about it on the web. I missed the Syon cope when I visited the Victorian and Albert Museum on my last trip to England. The Information Stand that now stands in the main entry hall is not an aesthetic replacement.

The result of being clueless was that when we got to the point of producing a design for the next technique, I was dumbfounded, speechless and without a thought or an idea in my head. Miss Randell coaxed me into some sort of a decision and a design for Regal Lilies using Long and Short Stitched stitched in wool emerged. I had never even seen a Regal Lily and I do not think that anyone else had either. Remember that London was bleak and grey at that time and even the basics of life were in short supply. Available flowers were only those hardy perennials that had survived the war years. My choice was governed by the dream of an unobtainable exotica and the colours. Even after the decision was made, side views and details were guess work. The shading was guided by Miss Randell without whom I would have been totally lost instead of only 98% lost. Now we can turn to Google Images and find a wealth of information and pictures on every subject possible.

I was interested to hear from Marion Scoular, who many of you will know, about her experience of RSN and design. She started her training two years after Gillian and myself. For her first year, Marguerite Randell was her teacher; the second year, Miss Randell moved to the workshop section and Beryl Dean became the senior teacher in the school. Beryl Dean was an RSN graduate but was also an accomplished artist and designer. She tried to change the curriculum and place more emphasis on design. However, the Board of Governors did not agree with her and she only taught there for one year. What a missed golden opportunity that was. Her work is amazing and well worth researching on the web.

When I look at the current RSN students' gallery, I am totally amazed at the variety and ingenuity displayed. Their work is a lifetime different to anything we ever created.

www.royal-needlework.org.uk Gallery: Degree students work


Tuesday, July 30, 2013

The Alice Project

Ellen Collington was a participant in our 'Creative Use of Stitches Class' in Guelph. She drew her inspiration from Lewis Carroll's Alice in Wonderland and Salvador Dali. As well as these two creators, she also combined the learnings of three classes into this project. You will see photoprinting on fabric, a variety of stitches and the construction of an accordion book. On top of all these variables, her house was undergoing extensive renovation, her workspace was nonexistent and her stash unavailable.

Down The Rabbit Hole:

Sailor edge, feather, knot, seed, satin, straight, pekinese
Chain: square
Outline: whipped


Advice from a Caterpillar:

Antwerp edge, back, rope, knot, pearl, vandyke, outline
Chain: twisted, whipped
Feather: closed

"Who in the world am I? Ah, that is a great puzzle"

"Do you think I've gone round the bend?"

"I'm afraid so. You're mad, bonkers, completely off your head. But I'll tell you a secret.
All the best people are."

"You used to be much more...'muchier.' You've have lost your muchness."

"And what is the use of a book, thought Alice, without pictures or conversation?"

"My dear, here we must run as fast as we can, just to stay in place. And if you wish to go anywhere you must run twice as fast as that."


The Mock Turtle's Story:

Sailor edge, satin, web, knot, feather, back, straight, buttonhole
Outline: whipped
Chain: square twisted, whipped, detached


Alice's Adventures in Wonderland

Written by Lewis Carroll. Pen name for Charles Dodgson (1832 - 1898)


Salvador Dali (1904 - 1989)

Spanish Surrealist Painter


The Mad Tea Party:

Antwerp edge, back, knot, feather
Outline: whipped
Chain: twisted, whipped

My challenge criteria for the Alice Project

To develop a stitch sampler, using as many traditional stitches as possible.

To work entirely by hand, using only DMC: stranded cotton, spooled metallic thread
and number 5 perle cotton.

To use stitch only . . . no beads, applique, yarn, silk, ribbon, purchased or machine made embellishments.

To highlight focal points and allow at least 50% of the printed background to show.

To use the colours as they appear in the printed fabric rather than the brighter version in the photos.


There are eight embroideries in the Alice Project book. They are combined with the photos and text in a book that opens out in both directions like an accordion.

I hope that you have enjoyed seeing Ellen's creativity. I will be forwarding all your comments to her.


Sunday, July 21, 2013

Trestles or Easels Specifications

Trestles or Easels can be made at home if you have the tools. They are an effective support for large sized rectangular or square stitching frames and for slate frames. Mine were made in a long time ago by the staff and patients in a chronic care hospital. At that time, although I knew what I wanted, I could supply neither picture nor measurements but they turned to be perfect. I will add as many photos as possible so that you can see how they are constructed and you can alter the construction as you wish. I was 5'8'' tall at the time, somewhat less now, but the size continues to be satisfactory.

1) The uprights and lower cross bars are 2" square lumber which is the finished size. The edges are bevelled and well sanded.
2) The front post is 29" high and the back post is 31" high. The lower cross bar is 30" long and the lower edge is 9" above the top of the foot.

3) The upper end of the front and back posts have a trough chiselled into them all of which are 2" deep and 3/4" wide. It would be preferable if they were 1" wide in that the upper cross bars would not then be wedged in place.
4) The upper cross bars are placed within these troughs and they support the stitching frame itself. They are made of a wood that does not warp and are 3/4" wide, 3/4" inch deep and 37" long. The sloped surface for the frame is efficient and comfortable for stitching.
5) The feet are each 12" long and 1 1/2" wide. Each of them has two extra pieces of thin wood added to their under surface to lift them off the ground a little and to level them. They are stable on carpet.

6) To return to the upper cross bars, at RSN these were thin pieces of wood like haberdashery yardsticks. The outer ends had holes drilled in them at regular intervals. The sides of the troughs in the uprights also had holes drilled into them. A cotter pin could be placed through the three holes thus allowing for the upper cross bars to be height adjustable. The cotter pins were tied to the trestles with string preventing them from being frequently lost!!

7) The front support for the stitching framed is 3/4" wide, 1/2"deep and 42" long. This is really longer than is necessary and it is likely something shorter would suffice here. Though, if your frame was really wide you would need longer support bars to accommodate the width.
8) The lower cross bars are held in place by a long screw, washers and a wing nut. The wing nuts are on the outside of the frame where there is no question of scraping a leg on them. This means that the frames could be dismantled but I have never done this.
9) The wood has never had any finish put on it. I wipe it with a damp cloth occasionally.
10) Then I added a couple of extra items which I find to be really useful.

The first is the addition of a piece of old lumber that is 8" wide, 3/4" thick and 33" long. I place it across the far end of the trestles/easels where it serves as a shelf and supports the far side of the frame. On it I place a stitching light. I have one with two adjustable arms with a light shade and bulb on each arm. One arm has a Daylight bulb in it and the other has a regular 100 watt bulb. The dual bulbs eradicate shadows and give me a good working light. This light fixture is decades old and you might now need two separate lights for the same benefit.

Supplies and tools can live on this shelf where they are handy but not in the way. It would be even better if the shelf was covered with a non slip surface such as felt.

The second addition is an electric socket attached to one of the upright posts. This means that the cord for the table lights does not get pulled and that I can attach the whole setup to an extension cord. I sit on a comfortable, height adjustable office chair with good back support but without arm rests. A footstool adds to comfort and eases any pressure on the nerves and circulation in the back of the leg. I find this whole set up to be extremely satisfactory and very comfortable. We have cats and they can decide that my stitching frame is a comfortable place for a nap. I place crossed yardsticks on top of the covered (using a towel or sheeting) surface of my stitching. This seems to be an adequate deterrent.

If you would rather purchase trestles/easels already made, Mary Corbet knows of a supplier.

If you visit the following website, the Unbroken Thread by Kathy, you will find an entry in the Older Entries entitled Friends at RSN. The fifth photo in this entry shows the details of modern easels. You will notice that the front posts are high and are drilled to allow for height adjustment. This is not necessary if you will be the only person using the trestles. You will also notice that the frame is placed directly on the side bars without the addition of the far shelf for a light and tools and also without that front bar that supports the edge of the stitching frame that is nearest to you. This means that the width of the setup is controlled by the width of your stitching frame. With the addition of the front bar allows the space to be as wide as you wish or is convenient for you.

http://www.theunbrokenthread.com/blog/

And one final photo which I hope will explain everything!

Have fun and wishing you Happy Stitching.

Please email me if you have questions or comments.

Thursday, July 4, 2013

Royal School of Needlework - Part Three

It is more than time to return to my account of being a student in the 1950s at the Royal School of Needlework. Part Two is dated March 25, 2013 and available for you to establish continuity.

On Friday, April 6, 1951, The Times Educational Supplement published a full page article called the Tradition of "Opus Anglicanum". After a brief historical review, the article continues to describe the syllabus and experience of the course and then mentions employment opportunities. A press photographer took some photos and three were published. This first photo was not one of those published but is the only one that I have in my possession. Efforts to obtain better quality prints of the others have been unsuccessful so we have done the best we could with a scan of a 60 year old newspaper page.

This first photo was staged and is thus not a realistic scene. For instance, we did not sit in a row. The first stitcher on the right and the furthest stitcher were older and had started a few months before the other three of us. This is evident in that they are working on the third sampler which was Crewel work. The nearer of the two young ladies stitching their second sampler is Gillian Cox and to her right is Carmel Leibster. The student stitching the sampler loose in her hand is me. And no, I do not recognize myself either! Both Gillian and Carmel are stitching on their own frames while I was given the work of an unidentified student to give the photos more variety. In reality, I was at that time stitching the same sampler as Gillian and Carmel. And we all hated that tedious piece of applique on which we learned to stitch accurately and with totally even spacing. And we also learned to stitch fast. If you watch the videos made by Erica Wilson, you will see how quickly she works. Note that our trestles (or easels) are ancient. We stitched with our work covered (like a surgeon) and not uncovered as is indicated. Carmel's protective cloths are folded and hanging on her trestle. Gillian has hers protecting the edge closest to her which is the part most likely to be snagged by leaning on it. Old white cotton sheeting is ideal for protection cloths. It does not need to have finished edges but it is desirable to launder them occasionally. Gillian now lives in the eastern USA, I am in Canada while Carmel remained in London. The parquet floor and panelled wall are original but the hot water radiator is probably a more recent addition as the house was built in the 1850s.

This is a general view of the classroom. Note that the students are sitting in a random manner, the normal layout. What is not normal and staged for the photographer is that the frames are uncovered. The student on the left is stitching on her goldwork sampler. Note how much larger is the frame and fabric when compared with our beginner samplers. Many types of embroidery can be rolled around the roller bar using extra fabric for padding and protection. Because of the padding within the motives and the desirability of not disturbing the gold thread in any way it is not possible to do this with goldwork hence the frame gets larger and larger.

A closer view of the student working on her goldwork sampler. All students first stitched the three emblems at the top - a pomegranate, crown and fleur de lys. The remaining three to six items on the sampler were our own design. This was a third year project and demanded a lot of time and skill to complete the technically demanding designs that we were inspired to create. Note the size of the frame and fabric when compared with our beginner samplers. She would have stitched the upper three motives with the extra fabric rolled onto the roller bar at the base of project. Having completed these, the fabric would have been unrolled giving access to the middle of the design. When that was completed she would have unrolled the rest of the design. Many types of completed embroidery can be rolled around the roller bar using extra fabric (such as sheeting) for padding and protection. It is not possible to do this with goldwork hence the frame gets larger and larger. Notice, too, that she has two spools of gold thread. Japanese gold is couched down in pairs. Having two spools means that the twist on both threads is the same allowing the gold thread to reflect light in the same way. As goldwork is all about light reflection this is the correct way to do this and it does make a difference to the finished piece. It would appear that she has included some silk shading in this dramatic and ambitious piece. I wish I knew her name.

Goldwork or Metal Thread Embroidery as it is often called, is a wonderful medium in which to work and I am glad that I had just enough time to include this in my studies. I do have my sampler but it is simple compared with the one in this photograph. I had three weeks to complete the whole thing before leaving to move on to college. It had to be simple and manageable in terms of the number of stitches needed. I love teaching goldwork though my students are encouraged to choose designs that are more contemporary than traditional. Even so, we all continue to use the techniques and skills that have been used since medieval times and even before. Goldwork had reached a high standard of technical expertise several centuries ago as is evident in Opus Anglicanum found in the Syon Cope and other works located in such places as Durham Cathedral and museums.

Our principal and senior teacher was Marguerite Randell. She is indicating a detail to the student who is one of our two older stitchers. Note that the protection cloths are hanging on her trestle and that she is stitching with one hand on the top surface and one underneath. Stitching this way is how the professionals do it and it helps with speed and accomplishing the project in a cost effective manner.

Marguerite Randell (1881 - 1955) was a superb teacher. She wrote three very detailed books on stitching: Simple Embroidery, More Simple Embroidery and Plain Sewing. All were published by Cassell and Company, Limited. These small, thin books contain a mass of information with detailed and accurate diagrams. I recommend them to serious stitchers for whom accurate information is more important than beautiful colour photography. I have originals but they have been reprinted and are available through AbeBooks.com. 1952 was her last year of teaching after which she worked in the workroom on commission pieces. She seemed very elderly to us young ones and she certainly did work long after normal retirement age. She was a gentle and gracious lady who knew exactly how to do everything. Erica Wilson acknowledged her as "my first teacher, who knew more about needlework than anyone I’ve ever known - the late Marguerite Randell".

Both Gillian Cox and myself echo this sentiment wholeheartedly.


Thursday, June 27, 2013

Creative Use of Stitches

Meet Frances Fordham. Frances is a friend and a neighbour and has embroidered, quilted and rug hooked sort of forever. She always stitches flowers but look at these flowers closely and see the detail and how effectively she has used the stitches.

This first one is Running Stitch and French Knots. Frances finished each piece as a quilting square and then joined them to create a table runner.

The Lilies are stitched with Chain Stitch and variations.

The Pansy is stitched with Stem Stitch and variations, Cross Stitch, Herringbone Stitch and Threaded Back Stitch.


This last one is a Single Dahlia. The stitches are Buttonhole Stitch and variations, Cretan Stitch, Herringbone Stitch, Fly Stitch, Stem Stitch, Chain Stitch, Satin Stitch, Long and Short Stitch, Rumanian and other Leaf Stitches.

The threads Frances used were DMC Coton a Broder and Clarks Anchor Floss with a few extras included as needed.

Thursday, June 6, 2013

Accordion Book Stitched On Blue Linen

Judy Eckhardt was a member of our class in Guelph earlier this year. I have pleasure in sharing some of her work with you. Judy teaches machine embroidery and quilting but had not been using hand stitching creatively. This class was an opportunity for her to become acquainted with the huge variety of embroidery stitches.

All her pieces were stitched on fine handkerchief linen which she dyed herself. She used Treenway Silk threads wherever possible adding DMC Floss to add a needed colour. She made her pieces into an accordion book.

Blue is Judy's favourite creative colour and, like Barbara Lee, she chose the challenge of working predominantly with blue on blue plus other colours in a congruent range of tones.

Chain Stitch and Variations plus Sorbello Stitch and Split Stitch


Cross Stitch, Stem Stitch, Outline Stitch and Turkey Work
You can see on this one how Judy finished her pieces and assembled them into a book.


Spider Wheels, Couching and Herringbone Stitch


The back cover of the book features Trellis Work and French Knots


To my surprise, Judy used no machine embroidery anywhere in this project.