Monday, November 4, 2013

Windsor Castle and St. George's Chapel

I have been on vacation in England and Europe visiting lifelong friends and family. Yes, I had a wonderful time because it is such a treat to see everyone and to spend time in London and the Channel Islands.

My cousin, who had written ahead and made the arrangements, and I visited Windsor specifically to see the Beryl Dean Embroideries. We were expected and were taken through the rope barriers to the case where the embroideries are now stored. The case was then unlocked by a staff member so that we could see all five of the banners. Everyone was most helpful and it made a huge difference that they were expecting us.

I had forgotten how large the panels are, probably around 10 feet high by 5 feet wide. The size makes them difficult to photograph but the guide book features this one: The Adoration of the Magi. A scan and a screen shot of the page in the book is the best reproduction that I am able to provide for you. This photo does not do the panel justice at all.

The background fabric was specially woven and is cream coloured with a silver thread included in the weft. When one has the opportunity to look closely the detail is fascinating and the workmanship incredible. But I would expect no less from such a talented designer and broideress. The closer one looked, the more one saw. All the faces were different in structure and expression and each one had eyes that saw you and returned your gaze. All the different techniques used were astounding.
Interestingly, though there is a lot of detail in the background, it remains in the background leaving the figures to be prominent and draw your attention. I have added an enlargement to give you a little more idea of the intricacy in every square inch of these embroideries. I wish that I could have provided better photos for you but this is the best that I can manage.

Needless to say, if you should happen to be in Windsor, go to St Georges's Chapel within the grounds of Windsor Castle. Write beforehand and tell them your schedule and ask to see the Beryl Dean Embroideries. At the moment, the lighting available near their locked case is poor but I have asked the Chapel to consider installing lighting that can be switched on only when visitors such as us make a request to see the panels. The case and the lack of any direct light will preserve these remarkable pieces for posterity and I hope that they will be enjoyed by many future generations.

Write to:

The Archivist
Archives and Chapter Library,
The Vicar's Hall Undercroft
The Cloisters
Windsor Castle,
Windsor, England
SL4 1NJ

They prefer to receive such requests by mail.

Beryl Dean was such a remarkable and talented lady that I am surprised that no one has yet written her biography. This would be an excellent subject for a University Thesis.


Tuesday, September 24, 2013

Royal School of Needlework - Part 5: Extended

The earlier RSN post triggered many responses and more information which I am delighted to share with you.

Marion Scoular, who many of you know, and who was a student at RSN just after I left, tells me that the gown worn by the Queen for her Coronation, was not only designed by Norman Hartnell but was constructed and beaded in his workrooms. RSN did not do beadwork.

The train or robe was designed and stitched at RSN by their work room staff. It took 12 embroiderers 3500 hours of stitching to complete this, working round the clock from March to May. The cuttings from the velvet of the train were made into pin cushions and sold to the public. Does anyone happen to own one of these pincushions?

A further email from Debbie credits the National Trust for preserving Joan Lander's embroidery and legacy.

Sue Jones of Shropshire tells me that she was fortunate to meet Joan Lander once or twice as an elderly lady. Joan was President of the local Embroiderer's Guild. At one meeting where the speaker was dismissive of traditional embroidery skills, Joan got up and walked out. I do remember hearing about this at the time but did not then know who Joan Lander was. There was a time a few decades ago when embroidery was very experimental and people were not interested in traditional work. That time has passed and experimentation has become more moderate and the traditional skills are honoured. Sue comments that Joan's embroidery was exquisite.

I hope that the correct information plus this wonderful photo will set the record straight.

A future subject for this blog will be Leek Embroidery. If you have some information on this subject, I would appreciate receiving it so that the record here is as complete and accurate as is possible.


Sunday, September 15, 2013

Royal School of Needlework - Part 5: We Hit the Jackpot!

Every now and again, the internet delivers a wonderful surprise. In early September, Debbie, who lives in Shropshire, England sent me a brief note saying she was able to identify the young lady who was stitching the GoldWork Sampler in the class photo at The Royal School of Needlework. Would I like to know her name?

I felt that I had won the pot of gold at the end of a treasure hunt. My profound thanks to Debbie for the initial information and then looking for more and sending me all that she found.

The young lady stitching that complex piece was Joan Lander. She was older than us teenagers having served as a nurse during World War lI and then started training at the Royal School of Needlework in 1947. At the time of the photograph she would have been in her last year of studies (see Blog entry of July 4, 2013).

Joan Lander's family home was Sunnycroft. Wikipedia supplied the following history:

Located in the market town of Wellington, Shropshire, England, and owned by the National Trust as one of their more unusual properties.

Suburban villas were almost 'country estates in miniature' that attempted to emulate upper class mansions on a middle class budget. Many have either been modernized, renovated or refurbished out of recognition over the last 60 years or so or have been demolished and replaced with later housing, converted into offices or residential care homes, or have been broken up into flats and smaller residences.

Rare Survivor

Sunnycroft remains intact, complete with the original interior fixtures and fittings, many of which are still in place and therefore has a unique character and intimacy that is often lacking from larger properties but very evocative of its time and place.

Sunnycroft was built in 1880, and extended in 1899. Uniquely the house remained in the same family from its completion in 1899, until it was bequeathed to the National Trust in 1997.

The National Trust summarises Sunnycroft as:

A late 19th-century gentleman's villa – typical creation of Victorian era suburbia
Rare unaltered interior, with an elaborate conservatory
A mini country-estate, with pigsties, stables, kitchen garden and orchards
Colourful borders and summertime flower displays
Superb long avenue of redwood trees and lime trees.

Visitors to the house will get an insight into some of the exquisite embroidery worn at Westminster Abbey and can browse through souvenir newspapers.

The ‘Thread Through History’ exhibition is housed in Miss Lander's former bedroom and embroidery workshops are planned throughout the year.

Joan Lander travelled far and wide to teach embroidery and traded as Joan Lander Designs. She was awarded a gold medal by the Royal School of Needlework and held lessons around the dining room table at Sunnycroft.

Joan’s travels led her to collect all sorts of textiles and designs that inspired her work – including several pieces of Leek embroidery – providing a link with the likes of William Morris, who designed pieces for the Leek Embroidery School.

“Among the amazing collection we have also recently discovered what we think is the largest collection of Leek embroidery in the country.”

The fabulous colours of the silks and fabrics have been perfectly preserved through years of being hidden away in various pieces of furniture throughout the house.

National Trust curators and conservators have been delving in to cupboards and chests of drawers to create this fascinating new exhibition.

Joan worked on the embroidery of the Queen’s Purple Robe of Velvet at the 1953 coronation.


Leek Embroidery is William Morris Designs stitched with Silk Thread. I had never heard of it until now.

The following piece of embroidery is now owned by the National Trust. Designed and stitched by Joan while a student at RSN, it is probably her sampler of Laid Work. The appearance and the fact that it was stitched with silk threads leads me to that conclusion.

Joan Lander, bequeathed the house and estate to the National Trust. Realizing its historical value, she did not alter or modernize the house.

You will find a tour of some of the house, contents and the gardens on the following site:

http://www.flickr.com/groups/sunnycroftnt


There is a picture of the billiard table which she did not use for billiards but rather as a storage area for her embroidery supplies. There is only one photo of her embroidery on this site but her early RSN samplers would have been the same as mine.

I have also read that she also worked on the gown the Queen wore to her Coronation. She was chosen to be part of this team because of her exceptional skills particularly in GoldWork. From the wording, it is not clear if it was the gown or the velvet train she worked on but both were embroidered by the Royal School of Needlework.

Debbie thinks that Joan’s GoldWork sampler may be in a local church and hopes to be able to find it.

To add to this discovery, Debbie found a Pathe News Film dated 1951. It was taken at the Queen's presentation of Diplomas to graduating students at the Royal School of Needlework. There is no sound track so here is a quick guide. I think that it was taken in the front office of the school's property at Princes Gate. Everyone bows or curtseys to the Queen and then to the Princess Royal who is seated on the Queen's right. The gentleman with the Queen is Earl Spencer, father of Princess Diana.

http://www.britishpathe.com/video/queen-elizabeth-at-needlework-exhibition/query/royal+school+of+needlework

The graduating students are, first, Joan Lander. She had won the Gold Medal as an excellent student. There is a bit of repetition and you will see her twice. The second lady, I do not know. The student second to last out of four (at 00:21) is myself!! Continue watching through the gentlemen receiving their honours. They were also graduates of RSN, presumably from the night school program as they were not among the day students. Following this, you will see the Queen touring the display of students' work. She is accompanied by Joan and is looking at the sampler which I am sure that you will now recognize. I am standing in the doorway at the back. I was wearing a blue wool dress made by my mother from a Vogue pattern. Is not the Queen a truly beautiful woman with a wonderful smile!

A link to another very short video of this momentous occasion was supplied by Claire Reeves of the National Trust. In this one, you will see more of the stitched samplers.

http://www.itnsource.com/en/shotlist/BHC_RTV/1951/12/24/BGU412150048/?s=Joan Lander

Notwithstanding Pathe's assertion that the film dates from 1951, I think that it is more likely to be 1952. My recollection is that RSN did not have a presentation in '51 because there were so few students actually graduating that year so the presentation of their certificates was postponed until '52. But until I locate my Diploma, I cannot be sure of the date.

I do remember the day and receiving my Diploma from the Queen. I did not get a higher level Certificate as I had only been a student for 18 months and had not completed the three year course. But I worked as hard and as fast as I could and completed about 2 1/2 years worth of work.

Debbie happened to find my blog as she is interested in embroidery and has taken a course on Crewel Embroidery taught by RSN and presented in her neighbourhood. She is eager for there to be another course and hopes to have the time to attend. She sent me a photo of her project which is a real credit to her and I hope that she will be able to continue this interest.

I hope that you have enjoyed this blog entry as much as I have creating it.


Monday, September 9, 2013

Burden Stitch - Part Two: a Tutorial

If you are using Burden Stitch as part of a design, you will have already decided on how you plan to complete the surrounding areas. On this sample, which is going nowhere except onto this blog, I had to decide on completion. The decision was a solid blue background around the area on the right and a section without blue fabric on the left.


The next step was to sink, or plunge, the ends of gold thread in the left area. Make yourself a lasso using a length of Perle thread or DMC, fold it in half and thread the two thicknesses into the eye of a Chenille or Tapestry needle. Make a hole with your awl in the spot you wish to take the gold thread through to the reverse side of your fabric. The lasso goes into that hole. Place the far end of the gold thread into the loop of the lasso. Gently ease the lasso and the gold thread through to the reverse side of your work. If you catch the gold thread too close to the stitching, it will not go through the fabric smoothly, The gold wrap will get stripped off its core and you will be unhappy with it and probably have to restitch that row.

Lassoing /plunging can be useful in other situations. It can be used for starting a thread or finishing cord that is too thick to go though any needle. If you have reached the end of some stitching and the last bit of thread is too short to finish off normally, then lasso it to the reverse side of your embroidery. It can also be useful in weaving threads into the reverse side of your work.

For the covered area on the right, I also lassoed the gold thread but placed the holes away from the edge of the circle where they will be covered by the blue fabric. Then, using a length of dressmaking thread, I whip stitched the ends of these threads to the the backing fabric. I do not always do this but felt that securing them was necessary in order to maintain the correct alignment of the gold thread on the front of the work.

Next step was to couch a single line of gold thread to the left side of the circle. I tried using one thread of gold with six threads of DMC along side but the DMC has a lower profile and slid under the gold. Unsuccessful and abandoned.

The blue fabric is a sample of drapery fabric from my stash backed with one layer of felt. I trimmed the inner edge of the fabric to about 1/4" and nicked it so that it would lie flat. Then I pinned it and basted it into position.

Using one thread of blue, I catch stitched around the inner edge of the blue fabric.

To complete the sample and to secure the blue fabric and felt to the background, I couched two threads of gold as a pair a specified distance from the inner edge. Once again, I used the reverse side of the very helpful business card to help me maintain an even distance from the edge.

And that is that. Completed. I hope that this tutorial has been helpful by taking the mystery out of working with this stitch and by making it simpler and less prone to hazard and unwelcome surprises.

The Flying Horse is stitched in Burden Stitch which is used as a solid filling stitch. It is part of my Metal Thread Sampler from RSN. The photo is not as good as I would have wished because it was taken through glass. The framed sampler is too large and heavy to move easily so we used the available light in our hallway.

Wishing everyone Happy Stitching.


Monday, September 2, 2013

Burden Stitch - Part One: a Tutorial

Burden Stitch is exactly that, a burden to stitch but I think that Burden is meant to be a noun and not an adjective. Barbara Lee Johnson's recent post on August 13, 2013 of the Couched Oak Leaf is a good example of Burden Stitch stitched on canvas. It is a stitch that can be used either very simply or you can set yourself a challenge. It really is a technique and not a stitch.

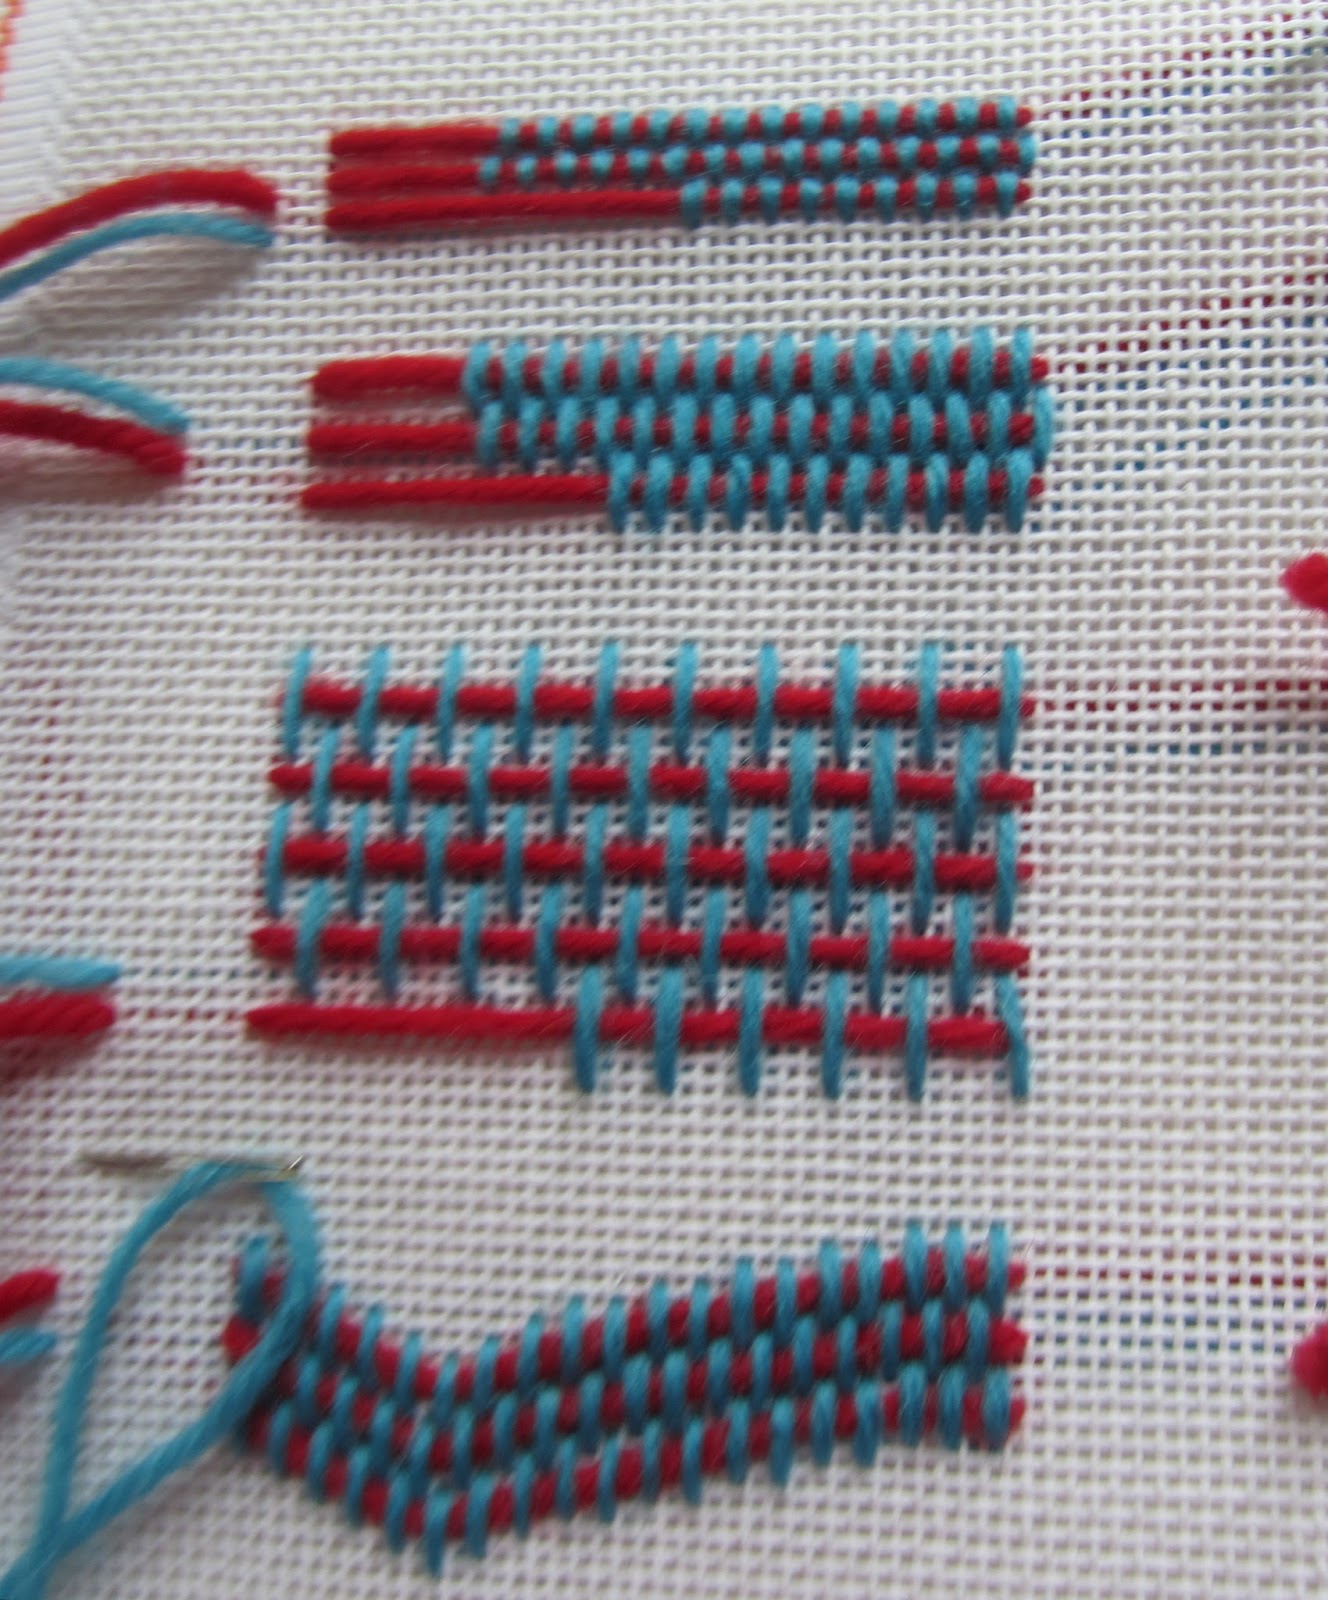
In a nutshell, this is a canvas work stitch called Trammed Upright Gobelin Bricking (Canvas Work by Jennifer Gray, pages 53 - 55). Worked on canvas or on even weave linen is the simplest way to use this stitch. It produces a solid ground cover or an interesting texture. Barbara Lee's example is an excellent sample of this.

When used on other fabrics, both planing and experimenting in stitch size and spacing is essential.

Number One Hint is to get organized. Back your fabric with a suitable weight of cotton fabric. This helps keep the tensions of your piece of work stable while you stitch and afterwards. It is also handy to for ending threads. I used Japanese Gold thread Number 12 with DMC Floss four threads which I stranded. Reading Mary Corbet's Blog, I see that it is called Striping. I have never heard this referred to by name and used Stranding instead. By either or both names, separate the six strands of floss thread into single strands and then put them back together. You can mix shades and create your own colours or, this time, use four threads of pure colour: DMC Blue 825.

Having marked your design on the background fabric, Hint Number Two: Baste in some horizontal and vertical lines to create an accurate grid that will help you keep your stitching accurate. This is specially necessary when working on a fabric where threads are not countable. This piece of fabric proved to be even count linen but even in this fabric, the threads vary in size.

Hint Number Three: Make a decision on the spacing of the couched thread (gold) and the length of the couching stitch. The gold thread is held in place by the spaces between the gold thread and the vertical couching stitches. I made the decision on this demonstration piece to place my vertical stitches four fabric threads apart. The second row of vertical stitches is centred between the previous row; that is, two threads on either side. Leave a tail of gold thread 1" or even 1 1/2" at each end of every row. This is necessary for sinking the ends of the gold thread. Any less length will cause you problems.

Hint Number Four: Use the blank, reverse side of a business card. Mark the spacing on the edges with a sharp pencil which will help give you the most accurate of templates. A ruler is OK but you will find your self constantly having to not read most of the marks on it. The blank card is a simpler solution.

Mark: a) the spacing between the horizontal gold threads and b) the length of the vertical couching threads.

Mark this spacing on two different edges of the card.

Use it on every row to set the spacing and length of the stitches. This is essential.

The straight edge is handy for checking the alignment of your stitches.

Hint Number Five: Using a length of dressmaking thread, anchor the ends of the gold thread out in another part of the design with some small stitches. This does not have to be totally accurate but it serves to anchor the gold thread leaving you free to focus on the stitching. The waves in the gold will disappear during the completion of this stitch. The gold thread that I used was from someone's stash. It had been wound on a small spool which made it exceptionally wavy. Japanese Gold Thread usually comes wound on a largish reel like dressmaking thread or as a hank. In this form, it is fairly straight.

Hint Number Six: Start in the centre of the widest point of the area being stitched. Work to the circumference in one direction and then return and stitch the other half of that row. The first line is by far the hardest to stitch. After that, you just have to follow your planned spacing and keep it all accurate. Use as small a needle as you are able to thread comfortably and insert it into the fabric vertically to establish an accurate stitch as possible. A needle entering the fabric at a slant will not give you the accuracy you need for this stitch.

Notice that on the right side, my stitches were off by one thread and I had to take them out.

Hint Number Seven: It is necessary to concentrate on what you are doing. It is totally easy to make an error in stitch placement and it shows up unbelievably clearly. Keep checking yourself and reverse stitch to where you went off course and correct it. Remember to stitch the necessary half and quarter length stitches.

And lastly, a quick look at an example of Burden Stitch in this piece of embroidery that I stitched a few years ago. The shading is not that satisfactory but I wanted to try it.

Notice the different spacing and threads. That looks to be two strands of DMC Floss.
Burden Stitch would look totally special if stitched with silk thread. It would gleam and not retreat into the background as a texture. It depends on the look you want to achieve as to what threads and spacing you use.

You can use different threads to achieve the result you require. A coloured Perle thread would work well instead of the gold and the couching thread can be anything you choose. You could choose to use beads as the couching thread but be wary. Beads can have a mind of their own and not lie as accurately as you would wish. You may discard a lot of beads in the process. Another possibility is to use Metallic Gilt and cut it into the desired lengths for the vertical stitches. Now that is a way of using this technique that will add grey hairs to your head for sure.

That is all for today. I will complete this demonstration piece in my next Blog Entry.


Saturday, August 17, 2013

Beryl Dean Panels

One idea or a question from the Blog triggers another Blogwrite.

I found, and would like to share with you, a website devoted to the magnificent panels embroidered by Beryl Dean and now in the care of St. George's Chapel which is located within the walls of Windsor Castle. I first saw the panels in the '70s and they were proudly displayed in a side Chapel of the Church. The next time, I was reluctantly allowed to see them after the the caretaker tried to deny their existence. The last time, about 10 years ago, my interest was unwelcome but I got a brief glimpse. The space had become a repository for extra chairs and pieces of furniture. I nearly cried that this had happened to these incredible pieces of ecclesiastical embroidery. On finding the following article on the web, I am relieved to see that they are now properly housed and hung. And treated with the respect they deserve.

The panels are large. A guess would be that they are between 3 and 4 feet wide, and 5 and 6 feet high. The colours are wonderful, and glowing. I think that she used silk threads as well as gold. Photographs do not do these masterpieces justice. I have enlarged the photos in the article but, even so, they only give an indication of their beauty. I do not know if Beryl did all the stitching herself or, if she had help, who else was involved. I wish that I had been one of them. And that says how much I admire them.

If you have a chance to visit Windsor, I heartily recommend that you see the Beryl Dean Panels.


From the College of St. George website:

http://www.stgeorges-windsor.org/about-st-georges/news1/news-archive/2011/beryl-dean-panels.html

2nd August (2011) marks the 100th anniversary of the birth of Beryl Dean. She died in 2001 but her remarkable work lives on at St George’s Chapel and other places in her embroidery and related work.

Between 1969 and 1974 Beryl Dean made five panels to hang in the Rutland chantry, one of the side chapels within St. George’s Chapel. On a background of especially woven linen and lurex she used a variety of techniques such as applique, drawn thread and pulled work. The five panels now hang in a special cabinet in the Ambulatory to protect them from too much light and dust. One panel is always on display and others can be seen on request to the Chapel staff. The work was commissioned by the Friends of St George’s and the Descendants of the Knights of the Garter to mark the Chapel’s quincentenary in 1975.

The five panels depict the Annunciation, the Visitation, the Adoration of the Magi, the Temptation in the Wilderness, and the Miracle at Cana.


Monday, August 12, 2013

Royal School of Needlework - Part Four: Designing

Remembering is fun especially when there is someone else to share memories and add to them. I am indebted to Gillian Cox, now Creelman (the dark haired young lady, second from the right in the first class room photo in my July 4 posting). We were both very happy to learn professional techniques from the masters of the art of embroidery but neither of us was particularly happy to discover that, after learning the basics on established samplers, we were expected to design our subsequent pieces of embroidery. These included Long and Short Stitch, Laid Work, Black Work, Coarse and Fine Whitework and Gold Work. How this piece of vital information could have surprised me is now beyond my comprehension. From hindsight, I will also comment that it is hard to design for a technique about which you, as yet, know little or nothing. I still have a mental block about designing but have developed some coping skills.

To aid us in this endeavour, we spent Friday mornings sketching in the Victoria and Albert Museum, the Natural History Museum and, Gillian tells me, she also sketched in Kensington Gardens and Hyde Park but that was after I had left. She remembers, as do I, that passersby would comment on what we were doing as if we were not there or were stone deaf. I dutifully went to the museums and sketched bits of the Syon Cope and stuffed birds but had no idea why I was doing it.

The Syon Cope is one of England's treasures. For those who do not know about this remarkable, large piece of embroidery, I will explain why. Made between 1300 and 1320, it is an example of the high degree of artistry and the use of the technique of Underside Couching. Commissioned by wealth it was made by professional stitchers in a workshop. The most expensive of materials was used and it was extremely labour intensive. Underside couching was a specialty of England and is known as Opus Anglicanum. The Syon Cope was taken out of England during the reign of Henry V111 for safe keeping and remained in France until the early 1900s when it was returned. This saved it because otherwise if would have been destroyed and the extensive amount of gold used in the gold thread would have been recycled into the Exchequer. I hope that this information is correct but you can read a lot more about it on the web. I missed the Syon cope when I visited the Victorian and Albert Museum on my last trip to England. The Information Stand that now stands in the main entry hall is not an aesthetic replacement.

The result of being clueless was that when we got to the point of producing a design for the next technique, I was dumbfounded, speechless and without a thought or an idea in my head. Miss Randell coaxed me into some sort of a decision and a design for Regal Lilies using Long and Short Stitched stitched in wool emerged. I had never even seen a Regal Lily and I do not think that anyone else had either. Remember that London was bleak and grey at that time and even the basics of life were in short supply. Available flowers were only those hardy perennials that had survived the war years. My choice was governed by the dream of an unobtainable exotica and the colours. Even after the decision was made, side views and details were guess work. The shading was guided by Miss Randell without whom I would have been totally lost instead of only 98% lost. Now we can turn to Google Images and find a wealth of information and pictures on every subject possible.

I was interested to hear from Marion Scoular, who many of you will know, about her experience of RSN and design. She started her training two years after Gillian and myself. For her first year, Marguerite Randell was her teacher; the second year, Miss Randell moved to the workshop section and Beryl Dean became the senior teacher in the school. Beryl Dean was an RSN graduate but was also an accomplished artist and designer. She tried to change the curriculum and place more emphasis on design. However, the Board of Governors did not agree with her and she only taught there for one year. What a missed golden opportunity that was. Her work is amazing and well worth researching on the web.

When I look at the current RSN students' gallery, I am totally amazed at the variety and ingenuity displayed. Their work is a lifetime different to anything we ever created.

www.royal-needlework.org.uk Gallery: Degree students work